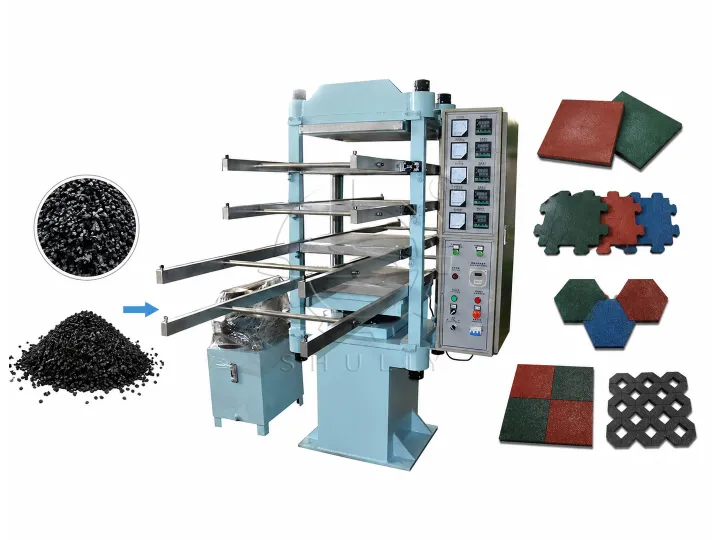
Every year, billions of waste tires are discarded around the world, and most tire recycling plant owners face the same question: how do I turn cheap crumb rubber into a product with a real profit margin? Learning how to make rubber bricks is one of the most practical answers. Rubber bricks — also sold as rubber tiles, rubber pavers, and gym flooring — turn the granules your recycling line already produces into a finished construction product that sells at several times the price of loose granules.
This guide walks you through the complete working process of a rubber brick making machine line, from mixing and weighing to paving, vulcanizing, and final inspection, so you can judge exactly how the process fits into your factory.
Why Rubber Bricks Deserve a Place in Your Recycling Plant
Rubber bricks are a two-layer product. The colored surface layer is made of fine rubber granules or fine rubber crumb that is dyed through a special coloring process, while the base layer uses coarse rubber granules or rubber crumb. This structure gives the brick a wear-resistant, colorful face and a strong, elastic body — which is why finished bricks are in steady demand from gyms, playgrounds, kindergartens, walkways, stables, and outdoor paving projects.
For a tire recycler, the business logic is simple. Selling granules is a commodity business with thin margins. Once you master this brick-making process, the same granules become branded products — safety tiles, gym flooring, interlocking pavers — that you sell by the square meter instead of by the ton.
What You Need Before Production Starts
Raw materials. The basic formula is rubber granules + rubber adhesive + color pigment, added in proportion. The surface layer uses fine colored granules; the base layer uses coarse black granules. One critical detail: the adhesive starts to cure once it is mixed, so you should only mix the amount of material you will press immediately.
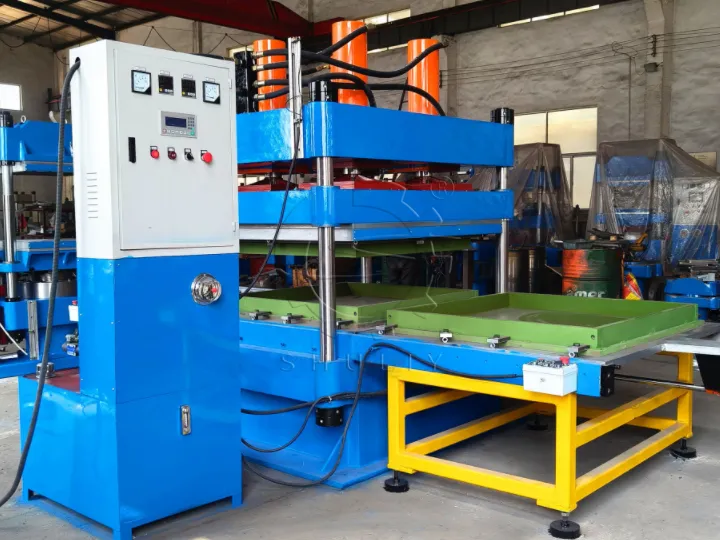
Equipment. A complete rubber floor tiles making machine line consists of three core parts:
- Rubber granule mixer — built with a mixing barrel, motor, agitator, and stand. For better efficiency and to prevent color differences between batches, the mixer can be configured with multiple barrels, so each color or layer is mixed in its own barrel.
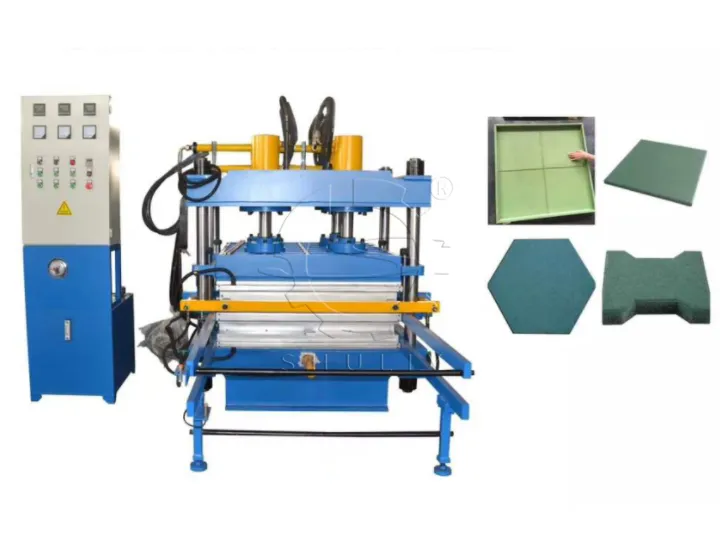
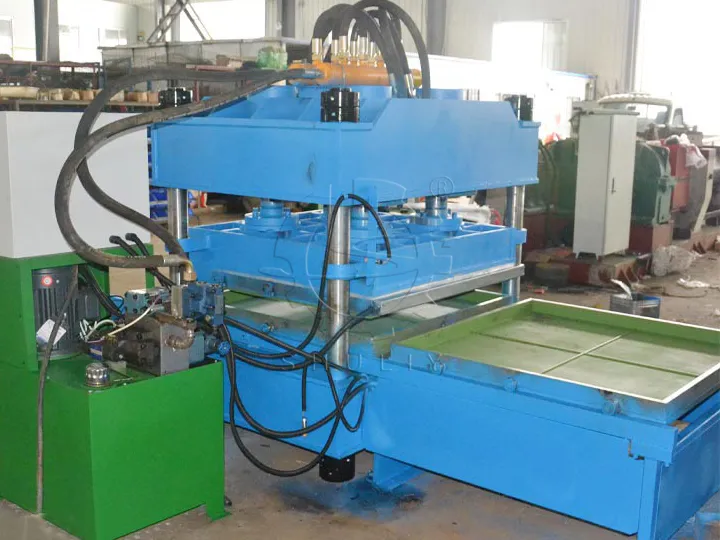
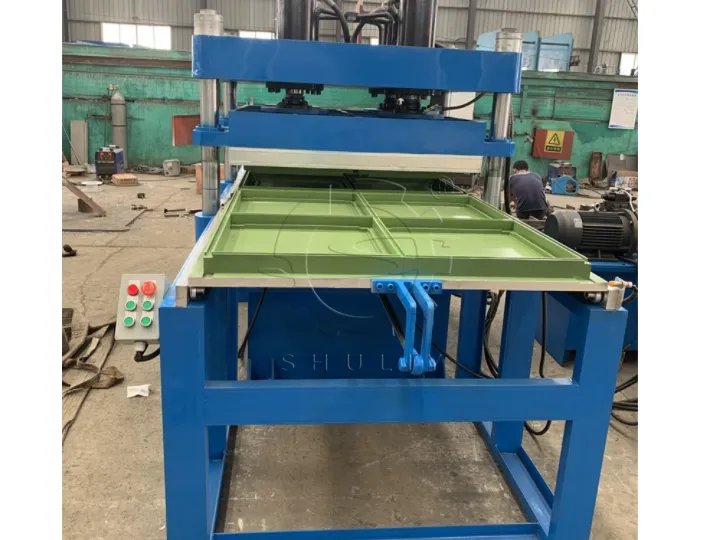
- Rubber tile press machine (rubber vulcanizing press) — a column-type, down-stroke hydraulic machine. Common models include the D550×550 and D1100×1100 heating platen sizes, matching different brick sizes.
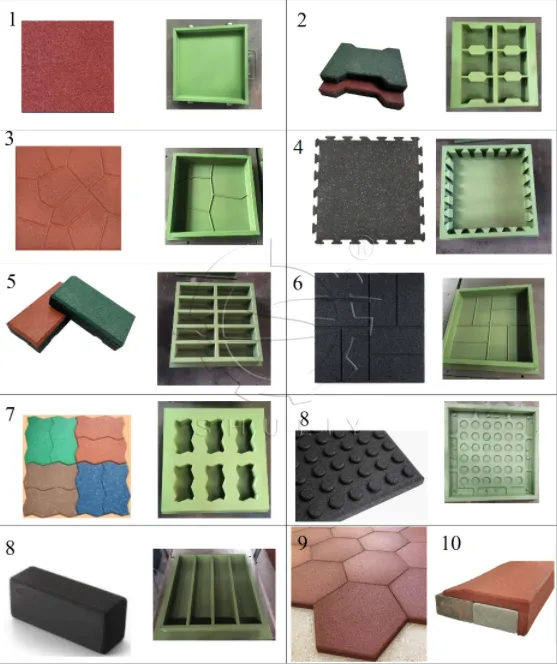
- Molds — mounted on push-pull guide rails. One mold set can produce bricks of different thicknesses simply by changing the adjustment tooling, and changing the mold changes the product: square tiles, interlocking pavers, rubber blocks, and more.
How to Make Rubber Bricks: The 5-Step Working Process
The whole process follows five steps: mixing → weighing → paving → vulcanizing → inspection. Heating, molding, and curing happen simultaneously inside the press, which is what keeps each cycle fast.
Step 1: Mixing
Put the rubber granules, adhesive, and pigment into the mixing barrel in proportion and stir until evenly blended. Mixing takes only 4–6 minutes per batch. Because the adhesive cures easily, the golden rule is: mix when you use it — never prepare large batches in advance, or the material will start to set before it reaches the mold.
Step 2: Weighing
Weigh the mixed material according to the brick design — the fine colored granules for the surface layer and the coarse granules for the base layer are weighed separately. Accurate weighing is what keeps every brick consistent in thickness, density, and color.
Step 3: Paving and Filling
Charge the weighed material into the mold and level it with a trowel. The correct order matters: lay the colored fine granules first, then the black coarse granules underneath. This builds the two-layer structure — a colored wear layer on top, a strong base underneath.
Step 4: Vulcanizing
After the mold is filled, cover it with non-stick cloth and slide it into the rubber tile vulcanizing machine. Inside the press, heating, forming, and curing happen at the same time. Vulcanizing takes 3–8 minutes depending on the thickness of the brick — thicker bricks need longer cycles. When the set time is reached, the machine opens automatically.
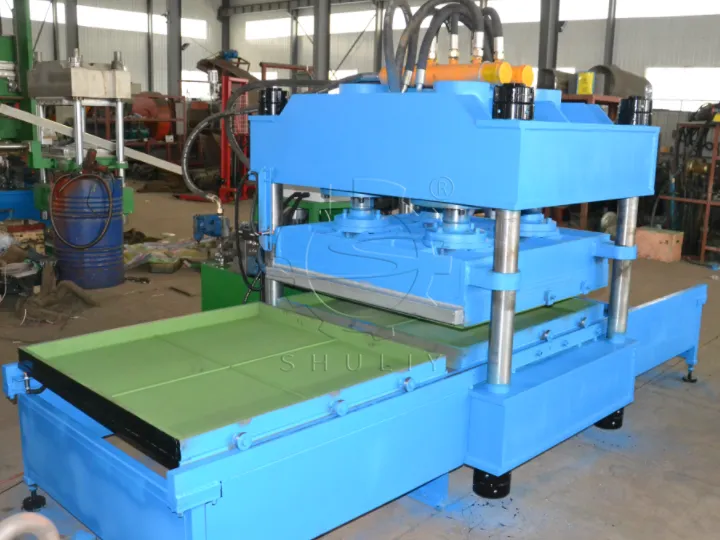
Step 5: Demolding, Cooling and Inspection
Take the finished brick out of the mold and place it on a rack to cool. Then inspect each batch against three standards: consistent appearance with no color difference, dimensions that match the specification, and a surface free of defects. Only bricks that pass inspection go into storage or shipping.
Inside the Machine: How the Rubber Tile Press Machine Works
The press is the heart of the line, so understanding its working principle helps you choose and operate it correctly.
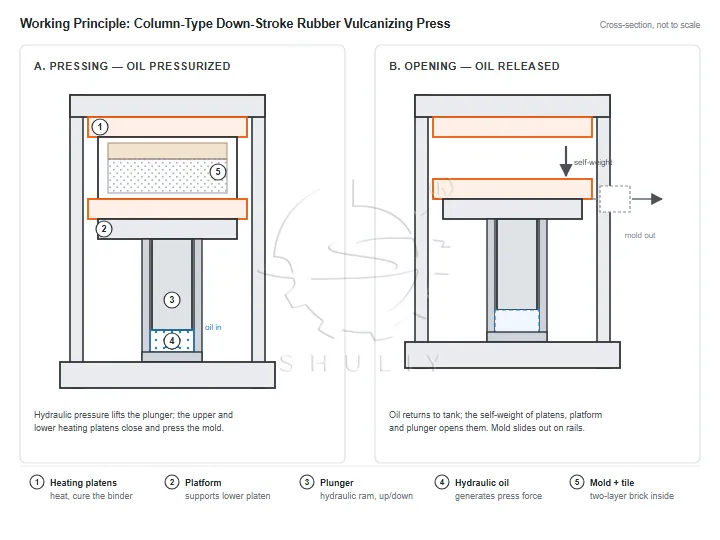
Column-type, down-stroke structure. The machine body consists of the frame, hydraulic unit, and electrical control system as an integrated design. In the down-stroke structure, the heating platens are opened by the self weight of the heating plate, platform, and plunger; when the plunger rises, the heating platens close, and the hydraulic oil provides the pressing pressure. This simple gravity-open, hydraulic-close design means fewer moving parts, safe operation, and easy maintenance.
Heating, forming, and curing in one cycle. While the hydraulic system applies pressure, the heated platens transfer temperature into the mold. The adhesive cures under heat and pressure at the same time, which is why a batch of bricks is finished in just 3–8 minutes.
Push-pull mold rails. The molds sit on push-pull guide rails, so the operator slides each mold in and out of the pressing position quickly. This raises production rate and reduces worker labor intensity — one operator can feed and unload in a continuous rhythm.
Intelligent control. The control system uses a human-machine interface with accurate time and temperature control plus a timed alarm, so the machine maintains stable curing conditions automatically and alerts the operator when each cycle ends.
One machine, many products. A D550×550 press handles standard 500×500 mm bricks, while a D1100×1100 press covers larger formats such as 1000×1000 mm sheets. Because changing the mold changes the product, the same rubber paver machine can produce square tiles, dog-bone pavers and rubber blocks — in fact, a rubber block making machine and a rubber tile press machine are the same rubber vulcanizing press fitted with different molds. This is what makes one press the most flexible investment in the plant.
Practical Tips to Keep Quality Consistent
- Mix on demand. The adhesive cures quickly; only mix what will be pressed within minutes.
- Match vulcanizing time to thickness. Start from the 3–8 minute range and fix the setting for each product specification; do not shorten cycles to chase output.
- Use multiple mixer barrels. Dedicated barrels per color prevent color differences between batches.
- Keep the non-stick cloth in place. It protects the tile surface and makes demolding clean and easy.
- Weigh every charge. Consistent charge weight is the foundation of uniform thickness and density.
FAQ
Is it difficult to learn how to make rubber bricks?
No. The process is simple, and the machine controls temperature and time automatically. Operators master it after short training — no professional technician is required.
Can one machine make different brick sizes and thicknesses?
Yes. Change the mold to change the product size and shape, and one mold set with adjustment tooling produces bricks of different thicknesses.
How long does one vulcanizing cycle take?
3–8 minutes, depending on brick thickness. Mixing takes another 4–6 minutes and runs in parallel with pressing.
How is making rubber bricks different from how to make rubber flooring in sheets?
The machine and process are identical. Large molds (for example 1000×1000 mm) produce floor sheets and gym flooring, while smaller molds produce bricks and interlocking pavers — you simply plan the mold set around the products your local market sells best.
How many workers does a rubber brick line need?
The press controls temperature and time automatically and gives a timed alarm, and the push-pull mold rails reduce handling work — so the line does not depend on skilled technicians, and operators can master it after short training. The exact headcount depends on your output target, how many mold sets you run, and your shift pattern; our engineer will confirm it together with the workshop layout plan.
Start Making Rubber Bricks with the Right Machine
Now you know how to make rubber bricks from waste tire granules — and the fastest way to start is with a properly configured line of mixer, rubber tile making machine and molds matched to your target products. Tell us the brick sizes, thicknesses, and daily output you plan, and our engineers will send you a machine configuration, working video, and quotation within 24 hours. Contact us today to turn your recycled granules into profitable finished products.